When it comes to creative outlets like writing, photography, painting and so on, I don’t think one rule applies to all. This is because it is extremely subjective to one’s idea and no one can dictate what looks good for you, it has to feel right to you. Pro-tip: You do you! However, this doesn’t stop people from asking me how to click a good photo (whatever good means to them). As I pointed out, I don’t think there are rules to be followed but I am sharing a handful of guidelines that I keep in mind and turn to, when in doubt.
These are basic-tricks that are applicable to any type of photography but today, I am using them to better explain how to shoot interior photography. Hopefully, these help you turn in the right direction – not classify you as good or bad.
Using natural light where possible
The golden interior photography lighting tip! If you’re going to pick any one advice from this blog, let it be this one -shoot your interiors with natural light. Prop your camera on a tripod and slow down your shutter speed for a long exposure. This allows the camera to catch all the good, natural light which in turn helps you avoid using artificial lights or flash. The colors will appear so much fresher and the shadows will come from natural directions. It is always preferred to shoot on a cloudy day as opposed to a very sunny one as this might distort the lighting across in the room.
Stage your shot
Styling is so important in this regard. The best interior photographs have followed this styling tip for interior photography – remove what does not add to your picture. Declutter the space in terms of wires, cords, cables. Take full liberty to decorate and restyle or reposition the space for optimization of composition. In post-production, you can always eliminate the switchboards and other immovable items if needed.
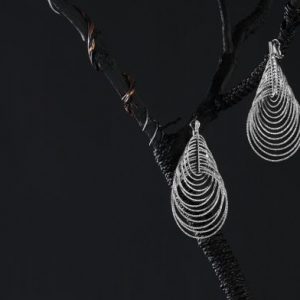
Click close-ups as well
Overviews are important but so is getting close-ups to help display the mood of the space. Focus on your depth of field by changing the aperture to ensure the hole of light that enters your camera is as big as possible. Imagine a close view of a decorative item and a larger room in the background but blurry – visions like these help the intended audience to gain perspective.
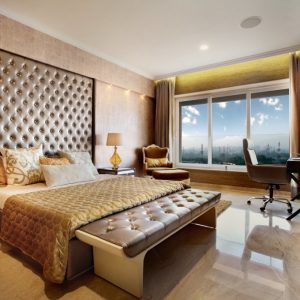
Create space
The best architecture interior trick? Create Space. Some of the best interior photographers will emphasize how important this is and I’ll tell you why. The hardest part of interior photography is the lack of space. So go ahead and mix it up! Move the furniture when it is standing in your shot or sometimes, change perspective by shooting from a bit further behind. Another guideline I always follow is, once I click a few shots, I review them to see what pieces of furniture or decoration are adding to my image and not taking away from it. This review helps you remove articles that are adding clutter. Use a wide-angle to capture as much of the space as possible.
Shoot straight
When you’re composing your interior photo, it is best to shoot straight. First things first, less is more, shooting at eye level and keeping the vertical lines straight aids in following the architectural composure and offering that authenticity to the viewer. Additionally, you can use a grid tool to maintain pointing your camera straight so that it aligns with one of the walls. This helps you have space to crop your photography, if and when needed.